There’s something about the crunch of childhood snacks that sticks with you, the kind that makes you reach for seconds without thinking. These baked zucchini chips are my twist on that nostalgia, but with a fresh, slightly gourmet touch. Instead of greasy bags, I prefer slicing zucchini thin and baking them until they’re crisp and golden, almost like a fancy, veggie upgrade.
It’s a simple recipe, but the beauty lies in how quick and forgiving it is. No deep frying mess, no greasy leftovers—just a handful of ingredients and a hot oven. Every time I make these, I remember those carefree afternoons, the crunch echoing in the quiet, and I realize how a little crispy snack can bring a moment of joy. Plus, they’re perfect for sneaking some greens into a snack attack.
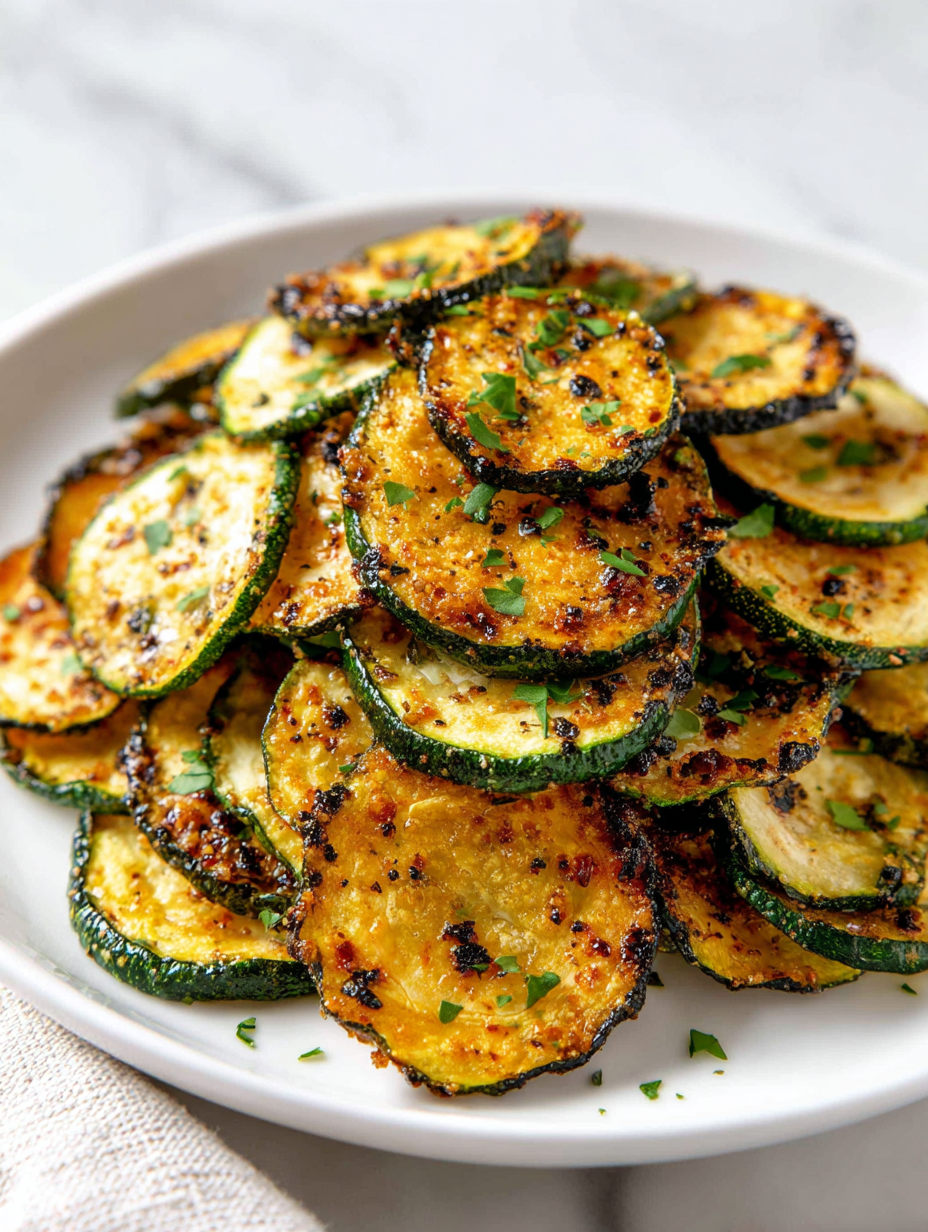
Focusing on the nostalgic crunch of childhood snacks, but reinvented with fresh zucchini and a touch of gourmet flair.
The story behind this recipe
- This recipe was born out of a lazy afternoon craving for something crunchy but healthy. I had a bunch of zucchinis sitting on the counter, and instead of the usual sauté, I thought, why not bake some chips? The process is so straightforward, it became my go-to snack when I want something satisfying without guilt. Plus, I love how the smell of baking zucchini fills the kitchen with a sweet, earthy aroma that’s strangely comforting.
- • I used to buy those bagged veggie chips, but they felt too greasy and overly processed. Making my own feels honest, and I can tweak the seasoning to my mood.
- • My kids love these, and it’s fun to see their eyes light up when they realize they’re eating something green and crispy.
- • There’s a small thrill in watching the zucchini slices turn golden and crisp in the oven, like little edible sunbursts.
Ingredient breakdown: key components
- Zucchini: I love using fresh, firm zucchinis—they slice easily and have that bright, grassy flavor. If yours are watery, pat them dry first to get crispy results.
- Olive oil: A light drizzle adds just enough sheen for even baking but keep it minimal; too much can make the chips greasy and dull their crunch.
- Salt: I prefer flaky sea salt; it melts into the chips, enhancing their flavor without overpowering. Adjust after baking for personal touch.
- Garlic powder: I like a sprinkle of garlic for that savory punch, but if you’re sensitive, start small—you can always add more after baking.
- Paprika: Smoked paprika gives a subtle smoky aroma and color, but you could swap it for cayenne if you want a spicy kick—or skip it altogether for a milder chip.
- Parmesan (optional): A sprinkle before baking adds umami and crispness, but for a dairy-free version, skip it or use nutritional yeast for cheesy depth.
- Breadcrumbs (if using): I sometimes toss a few in for extra crunch, but be mindful—they can make the chips more substantial and less delicate.
Spotlight on key ingredients
Zucchini:
- I love using fresh, firm zucchinis—they slice easily and have that bright, grassy flavor. If yours are watery, pat them dry first to get crispy results.
- Olive oil: A light drizzle adds just enough sheen for even baking but keep it minimal; too much can make the chips greasy and dull their crunch.
Seasoning (Salt & Paprika):
- Salt: I prefer flaky sea salt; it melts into the chips, enhancing their flavor without overpowering. Adjust after baking for personal touch.
- Paprika: Smoked paprika gives a subtle smoky aroma and color, but you could swap it for cayenne if you want a spicy kick—or skip it altogether for a milder chip.
Notes for ingredient swaps
- Dairy-Free: Nutritional yeast can replace Parmesan for cheesy flavor without dairy, though it’s a bit earthier and less creamy.
- Oil Choices: Avocado oil adds a mild, buttery flavor and high smoke point; olive oil gives a fruity note, but can be more pungent.
- Salt Variations: Kosher salt has larger crystals for a cleaner taste; sea salt adds a subtle minerality—adjust to your preference.
- Spice Options: Cayenne pepper can swap paprika for extra heat; smoked paprika offers a deeper smoky aroma, less bright than lemon zest.
- Herb Boost: Dried thyme or oregano can replace paprika for herby notes; use sparingly to avoid overpowering the zucchini’s delicate flavor.
- Sweet Touch: A pinch of cinnamon can add warmth, but keep it minimal so it doesn’t clash with the savory profile.
- Crunch Enhancers: Panko breadcrumbs give more crunch and a lighter texture than regular breadcrumbs; ideal if you want a crispier chip.
Equipment & Tools
- Mandoline or sharp knife: To slice zucchini evenly and thinly for uniform crispness.
- Baking sheet: To hold the zucchini slices during baking and allow heat circulation.
- Parchment paper or silicone mat: Prevents sticking and makes cleanup easier.
- Spatula or tongs: To flip slices halfway and handle hot chips safely.
- Wire rack: To cool the chips evenly and maximize crispness.
Step-by-step guide to baking zucchini chips
- Preheat your oven to 200°C (390°F). Line a baking sheet with parchment paper or a silicone mat to prevent sticking.
- Wash the zucchini thoroughly. Using a sharp knife or mandoline, slice the zucchini into thin rounds, about 2mm thick. Uniform slices ensure even baking.
- In a small bowl, mix a tablespoon of olive oil with a pinch of salt, garlic powder, and smoked paprika. Whisk until combined.
- Place zucchini slices in a large bowl. Drizzle the seasoned oil over them and toss gently to coat each slice evenly. If you want extra crunch, sprinkle a small handful of breadcrumbs over the slices now or just before baking.
- Arrange the zucchini slices in a single layer on the prepared baking sheet. Overlapping is fine but avoid stacking, as it prevents crispness.
- Bake for 20-25 minutes. Check at the 15-minute mark; the edges should be golden and crispy. If they’re browning too quickly, lower the heat slightly or move the baking sheet to the middle rack.
- Halfway through, flip the slices carefully with tongs or a spatula to promote even crisping. Keep an eye on them to avoid burning.
- Once the chips are golden and firm, remove from the oven. Let them rest for 5 minutes on the baking sheet to firm up further. They may seem soft straight out of the oven but will crisp as they cool.
- Transfer to a wire rack if you want maximum crispness, or serve directly from the sheet if you prefer them slightly softer. Sprinkle with a pinch more salt if desired.
- Taste the chips; they should be crunchy, with a smoky aroma and a hint of garlic. If they’re limp or pale, give them a few more minutes but watch carefully to avoid burning.
Let the chips rest on a wire rack for 5 minutes to crisp further. Serve immediately or store in an airtight container for up to 2 days, reheating briefly in the oven for crispness.
How to Know It’s Done
- Edges are golden and crispy with no soggy patches.
- Zucchini slices feel firm and crackle when handled.
- The aroma is smoky with hints of garlic and paprika, indicating proper flavor development.
Baked Zucchini Chips
Ingredients
Equipment
Method
- Preheat your oven to 200°C (390°F). Line a baking sheet with parchment paper or a silicone mat to prevent sticking.
- Wash the zucchinis thoroughly, then using a mandoline or sharp knife, slice them into thin, even rounds about 2mm thick. Consistent slices ensure they bake evenly and turn out crispy.
- In a small bowl, whisk together the olive oil, salt, garlic powder, and smoked paprika until well combined. This seasoned oil will add flavor and help the slices crisp up.
- Place the zucchini slices in a large mixing bowl and drizzle the seasoned oil over them. Gently toss to coat each slice evenly, ensuring all sides are lightly seasoned.
- Arrange the coated zucchini slices in a single layer on the prepared baking sheet, making sure they don’t overlap. Overlapping can cause uneven baking and sogginess.
- Bake in the preheated oven for 20-25 minutes, checking around the 15-minute mark. The slices should turn golden brown and become crispy around the edges. Flip them halfway through baking with tongs for even crisping.
- Once crisp and golden, remove the baking sheet from the oven. Let the chips rest on the sheet for 5 minutes—they will firm up further as they cool.
- Transfer the chips to a wire rack if you want maximum crispness, or serve directly from the sheet. Sprinkle with a pinch more salt if desired for an extra burst of flavor.
Notes
Pro tips for perfect zucchini chips
- Thin slices matter → Use a mandoline for uniform crispness and quick baking.
- Even coating → Toss zucchini slices in oil and spices thoroughly to avoid uneven crunch.
- Watch the edges → Keep an eye on the chips as they bake; edges turn golden first, indicating readiness.
- Flip halfway → Turn slices at 10-minute mark for uniform browning and crisping.
- Cooling counts → Rest chips on a wire rack for maximum crunch, avoid stacking straight out of the oven.
- Mind the moisture → Pat zucchini dry before slicing to prevent soggy chips and ensure crisp texture.
- Use parchment → Lining your baking sheet prevents sticking and helps with cleanup, keeping chips perfect.
Common mistakes and how to fix them
- TOO WET ZUCCHINI: Pat dry slices to prevent sogginess and ensure crispiness.
- OVER-TORCHED CHIPS: Remove early if edges turn dark; lower oven temp slightly.
- DULL CRACKLE: Bake longer or increase heat slightly for better crunch.
- FLOUR INCONSISTENCY: Toss slices thoroughly to coat evenly and avoid uneven baking.
Quick fixes and pantry swaps
- When chips are soggy, splash them with a quick spray of vinegar for a bright, crisp bite.
- If chips stick together, patch with a light brushing of oil before baking again.
- Splash a dash of lemon juice on slices to prevent browning if prepping ahead.
- Over-torched chips? Douse with a sprinkle of salt and serve immediately to mask the burnt aroma.
- When pantry lacks paprika, swap with smoked chili powder for smoky heat.
Prep, store, and reheat tips
- Pre-slice zucchini the night before; keep slices in an airtight container in the fridge to maintain freshness and prevent moisture buildup.
- Store baked chips in an airtight container at room temperature for up to 2 days; they may lose some crispness but can be briefly reheated to restore crunch.
- Reheat in a 180°C (350°F) oven for 3-5 minutes, watching for bubbling and crisping sounds—avoid microwaving, which makes them soggy.
- For longer storage, freeze baked chips in a sealed bag for up to a month; reheat directly from frozen for best crispness, adding a minute or two.
Top questions about baked zucchini chips
1. How thin should the zucchini slices be?
Use a mandoline or a sharp knife to slice zucchini as thin as possible, about 2mm. Thinner slices crisp better.
2. Should I dry the zucchini before baking?
Pat the zucchini slices dry with paper towels before seasoning to remove excess moisture for maximum crunch.
3. What oven temperature and baking time work best?
Bake at 200°C (390°F) for 20-25 minutes until edges are golden and crispy. Flip slices halfway for even baking.
4. How do I know when the chips are done?
Watch the chips closely after 15 minutes. Remove once edges turn golden to prevent burning and achieve perfect crispness.
5. What tools do I need for baking zucchini chips?
Use parchment paper or a silicone baking mat to prevent sticking and make cleanup easier.
6. How should I store and reheat leftovers?
Store leftover chips in an airtight container at room temperature for up to 2 days. Reheat in the oven for crispness.
7. What if my chips turn out limp or soggy?
If chips are soggy after baking, increase oven heat slightly or let them cool on a wire rack to crisp up.
8. Can I customize the seasoning?
For extra flavor, sprinkle with herbs or spices like thyme or cayenne before baking, but keep seasoning light to avoid overpowering.
9. How much oil should I use?
Use a light drizzle of olive oil; too much can make the chips greasy and dull their crunch.
10. When should I add salt to the chips?
Add a pinch of salt after baking for a fresh burst of flavor, adjusting to taste.
These baked zucchini chips are more than just a snack; they’re a reminder that simple, honest ingredients can deliver real satisfaction. There’s something charming about seeing those thin slices curl and crisp up in the oven, filling the kitchen with a smoky, earthy aroma. It’s a small, imperfect moment that’s easy to make your own, especially on busy days when you need a quick, wholesome crunch.
No matter how many times I make these, I’m always a little surprised by how much I enjoy that first crispy bite—salty, smoky, and just a hint of garlic. They’re perfect for sharing, keeping in the fridge, or just grabbing straight from the oven when hunger hits. Sometimes, the best snacks are the simplest ones, made with love and a bit of patience.

Welcome to Exploreing New Tastes. I’m really glad you found your way here. I’m a food blogger driven by curiosity more than perfection. I think about flavors constantly, how they change across cultures, how a small tweak can completely shift a dish, and how food tells stories long before anyone sits down to eat. This blog is where I document that curiosity, one recipe and one experience at a time.