Baked veggie chips are my way of turning odds and ends from the fridge into something crispy and satisfying. It’s like a little kitchen rescue mission, where every leftover carrot, zucchini, or sweet potato gets a second life as a snack. Honestly, the process is forgiving—if some chips aren’t perfect, they still taste better than any store-bought bag.
I love how this recipe isn’t about perfection but about experimenting with what you have on hand. It’s a quiet, mindful moment in my busy kitchen, slicing and seasoning, watching those raw vegetables transform into golden, crackly chips. Plus, it’s a sneaky way to get more veggies into your day without much fuss.
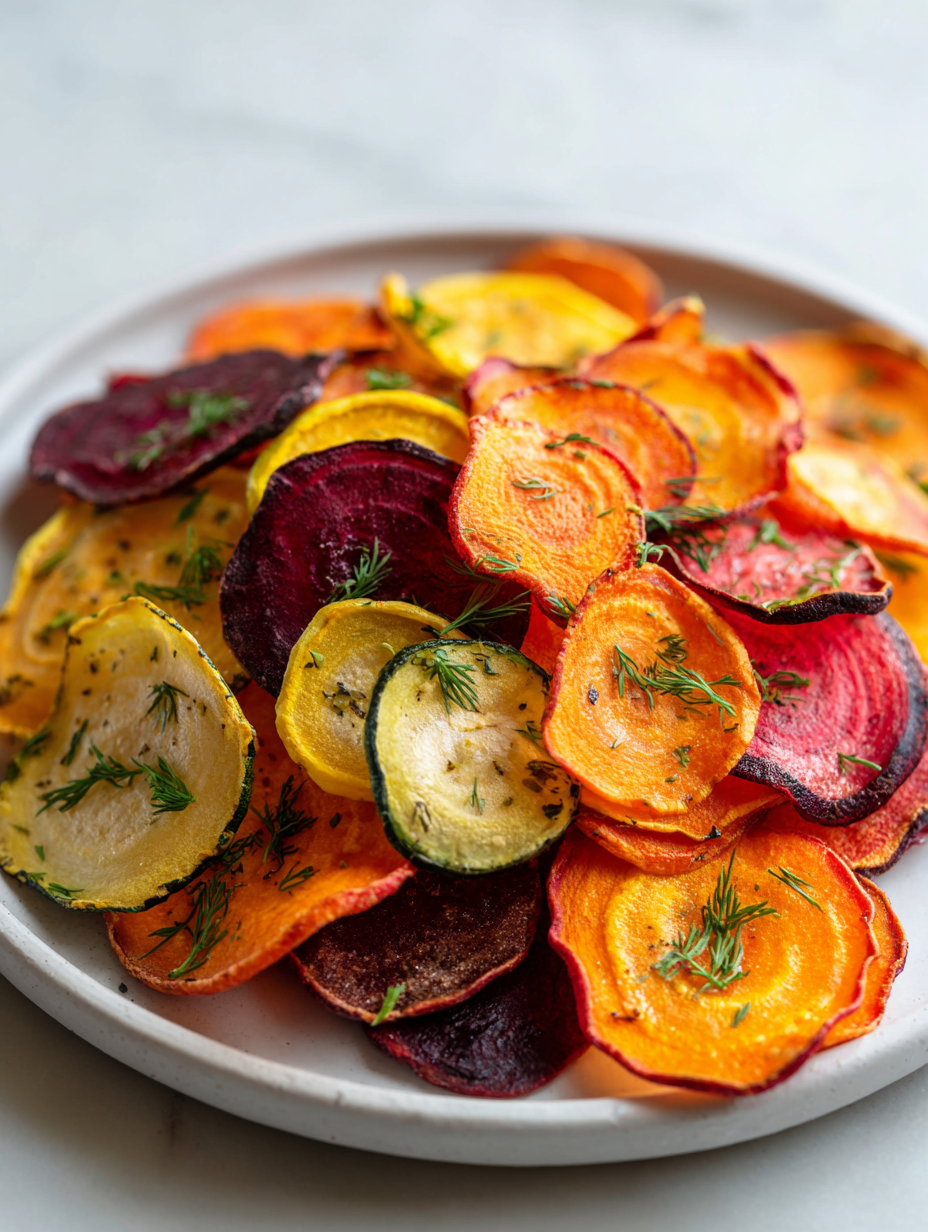
This dish reminds me that leftovers can be heroes, not just afterthoughts. It’s a simple, honest recipe that’s adaptable and forgiving, perfect for lazy weekends or when you’re just trying to clear out the crisper. Every batch is a little surprise—crisp, lightly seasoned, and slightly charred in all the right places.
Focusing on creating veggie chips that are not just a healthy snack but also a way to creatively use leftover vegetables from weekly meal prep, reducing waste and adding a personal touch to snack time.
The story behind this recipe
- This recipe came about one lazy afternoon when I was staring into the fridge, eyeing a pile of odds and ends—half a zucchini, a few carrots, some sweet potato. Instead of letting them go soft or toss them out, I decided to slice thin and bake. The first batch was a happy accident—crispy, a little smoky, and oddly addictive.
- It’s become my go-to way to use up leftovers, especially when I want something crunchy without reaching for chips or pretzels. It’s satisfying to turn humble veggies into something snackable and wholesome, no deep frying involved. Plus, the house smells like a cozy, toasty kitchen—really, what’s not to love?
Key ingredients and their quirks
- Kale: I love how kale crisps up with a slightly smoky, earthy flavor—perfect for adding a bitter contrast. If kale gets too tough, massage with a little oil before baking to soften edges.
- Sweet potatoes: Their natural sweetness caramelizes beautifully during baking, making the chips irresistibly oozy inside. Swap with regular potatoes if you prefer a milder taste; just adjust baking time.
- Zucchini: I find zucchini chips are lighter and crisp quickly—watch for that golden hue. For more crunch, slice thinner or sprinkle with a touch of cornstarch before baking.
- Carrots: Their bright, sweet aroma intensifies as they bake, giving a hint of caramelized sugar. Use parsnips for an earthier note, but expect slightly denser chips.
- Olive oil: I aim for a light, even coating that crisps without greasing the tray. If you want a richer flavor, switch to avocado oil, which gives a subtle fruity note and high smoke point.
- Salt & spices: I keep it simple with just sea salt—sometimes a dash of smoked paprika adds a smoky depth. Feel free to experiment with garlic powder or chili flakes for a kick.
- Lemon zest (optional): Adds a bright, zingy contrast that wakes up the earthy flavors. Skip if you prefer a more subdued, savory chip; or add more lemon for a punch of freshness.
Spotlight on key ingredients
Kale & Sweet Potatoes:
- Kale: I love how kale crisps up with a slightly smoky, earthy flavor—perfect for adding a bitter contrast. If kale gets too tough, massage with a little oil before baking to soften edges.
- Sweet potatoes: Their natural sweetness caramelizes beautifully during baking, making the chips irresistibly oozy inside. Swap with regular potatoes if you prefer a milder taste; just adjust baking time.
Notes for ingredient swaps
- Dairy-Free: Skip butter or cheese, use olive oil or coconut oil for a neutral, clean flavor.
- Vegan: Replace honey with maple syrup or agave nectar for a touch of sweetness without animal products.
- Low-Sodium: Use less salt or swap for smoked paprika or cumin for depth and warmth.
- Gluten-Free: Ensure spices are pure and free from gluten additives—most are naturally gluten-free, but check labels.
- Extra Crispy: Add a teaspoon of cornstarch or arrowroot powder to the oil before tossing veggies for extra crunch.
- Herb-Infused: Toss slices with fresh or dried herbs like thyme or rosemary for a fragrant twist.
- Spicy Kick: Incorporate chili powder or cayenne pepper into the seasoning mix for a fiery edge.
Equipment & Tools
- Mandoline: To slice vegetables evenly and thinly.
- Baking sheet: To hold the veggie slices for baking.
- Parchment paper: To prevent sticking and make cleanup easier.
- Spatula or tongs: To flip and remove chips safely.
- Cooling rack: To cool chips evenly and maintain crispness.
Step-by-step guide to veggie chips
- Preheat your oven to 180°C (350°F). Line a baking sheet with parchment paper for easy cleanup.
- Select your vegetables—thinly slice carrots, zucchini, sweet potatoes, or leftovers—aim for uniform thickness about 1/8 inch. Use a sharp mandoline if available for consistent slices.
- In a small bowl, toss the sliced veggies with a tablespoon of olive oil, ensuring each piece is lightly coated. Sprinkle with sea salt and your favorite spices; toss again.
- Arrange the slices in a single layer on the prepared baking sheet, leaving space between each to prevent sticking. Overcrowding leads to soggy chips.
- Bake for 12-15 minutes, then flip each chip carefully with tongs or a spatula. Continue baking until edges are golden and crisp, about 5 more minutes.
- Watch during the last few minutes; chips can go from perfect to burnt quickly. If edges darken too fast, lower the oven temperature slightly or remove early.
- Once golden and crisp, remove from oven and let sit on the baking sheet for 2 minutes to firm up. Transfer to a wire rack for complete cooling.
- Allow chips to rest for at least 10 minutes; they will crisp further as they cool. Serve immediately or store for later.
Let the chips cool on a wire rack for at least 10 minutes. Serve immediately for best crunch, or store in an airtight container for up to 2 days. Reheat in a 180°C (350°F) oven for 3-5 minutes if needed, until crisp again.
How to Know It’s Done
- Chips are golden brown and crispy on the edges.
- They crackle loudly when broken or bitten.
- They hold their shape without bending or sogginess.
Homemade Veggie Chips
Ingredients
Equipment
Method
- Preheat your oven to 180°C (350°F) and line a baking sheet with parchment paper.
- Use a mandoline to thinly slice carrots, zucchini, and sweet potato into even pieces about 1/8 inch thick—consistent slices ensure even baking and crispness.
- Place the sliced vegetables in a mixing bowl and drizzle with olive oil, tossing gently to coat each piece evenly. This helps them crisp up during baking.
- Sprinkle sea salt and smoked paprika over the slices, then toss again to distribute the seasonings evenly.
- Arrange the slices in a single layer on the prepared baking sheet, leaving space between each to prevent sticking and sogginess.
- Bake in the preheated oven for about 12-15 minutes, watching closely towards the end, until the edges turn golden brown and crispy.
- Carefully flip the chips using tongs or a spatula and bake for another 5 minutes, or until they reach your desired crispness.
- Remove the chips from the oven and transfer them to a cooling rack, allowing them to cool and crisp further for about 10 minutes.
- Once cooled, enjoy your homemade veggie chips immediately for maximum crunch or store in an airtight container for up to 2 days.
Notes
Tips for crispy, flavorful veggie chips
- THIN: Use a mandoline for even, paper-thin slices that crisp up perfectly.
- DRY MATTERS: Pat vegetables dry before baking to ensure maximum crunch and minimal sogginess.
- SEASON EARLY: Toss slices with oil and spices before baking for deep, flavor-infused chips.
- WATCH CLOSELY: Keep an eye during the last few minutes to avoid burning; chips go from perfect to charred fast.
- COOL OFF: Let chips cool on a wire rack to crisp up completely and prevent sogginess.
- SPICE UP: Add a pinch of smoked paprika or chili flakes for a smoky or spicy kick.
- STORE SMART: Keep cooled chips in an airtight container, but best enjoyed within 2 days for maximum crunch.
Common mistakes and how to fix them
- FORGOT to check oven temperature → Use an oven thermometer for accuracy.
- DUMPED slices too thick → Aim for 1/8 inch slices for crispness.
- OVER-TORCHED chips → Remove early and lower oven heat if edges darken.
- MISSED flipping midway → Flip slices at 10-minute mark for even crispiness.
Quick fixes and pantry swaps
- When chips are soggy, splash with a little extra oil and bake at a higher temperature for 2 minutes.
- If chips stick to the tray, patch with a quick sprinkle of cornstarch before baking again.
- Splash some lemon juice over raw veggies if they look dull—brightens flavor and crispness.
- Dumped too many slices on the tray? Rescue by removing excess slices and re-baking in smaller batches.
- Over-torched edges? Shield with foil for the last few minutes or reduce oven temperature slightly.
Prep and store tips for veggie chips
- Prep the vegetable slices ahead of time and store in an airtight container in the fridge for up to 24 hours; the slices remain fresh and easy to bake later.
- Store baked veggie chips in an airtight container at room temperature for up to 2 days; they stay crispy if kept dry, but will soften over time.
- For longer storage, freeze the cooled chips in a resealable bag for up to 1 month; reheat in a 180°C (350°F) oven until crisp, about 5 minutes, watching for crackling and aroma.
- Reheating chips restores some crunch but expect a slight loss of freshness; best enjoyed fresh, but a quick oven blast revives the texture.
Top questions about veggie chips
1. How thin should I slice the veggies?
Slice vegetables as thin as possible for maximum crispness. Thicker slices tend to be chewy and less crunchy.
2. Can I skip the parchment paper?
Use parchment paper to prevent sticking and promote even crisping. Greasing the tray isn’t necessary and can cause sogginess.
3. How long do I bake the chips?
Bake at 180°C (350°F) for 12-15 minutes, flipping halfway. Keep an eye near the end to prevent burning.
4. How do I know when the chips are ready?
Chips are done when they turn golden, crackle when broken, and feel crispy when cooled. They shouldn’t bend or be soggy.
5. How should I store leftover veggie chips?
Store cooled chips in an airtight container at room temperature for up to 2 days. Reheat in a 180°C oven for 3-5 minutes to regain crispness.
6. Can I use other vegetables?
Yes! Swap sweet potatoes for regular potatoes or parsnips for different flavors. Just adjust baking time accordingly.
7. Should I use a special tool for slicing?
Use a mandoline for consistent, thin slices. Uniform slices ensure even baking and crispiness.
8. How can I flavor the chips more?
Add spices like smoked paprika, chili flakes, or herbs before baking for extra flavor. Keep it light to prevent sogginess.
9. What if my chips are soggy?
If chips turn soggy, increase oven temperature slightly or bake a few extra minutes to crisp them back up.
10. Can I prepare slices in advance?
Yes, you can prep slices ahead and refrigerate for up to 24 hours. Bake just before serving for freshness.
These veggie chips are a reminder that simple ingredients can become something unexpectedly satisfying. Each crispy bite carries the aroma of roasted vegetables and a hint of seasoning, making snack time feel a bit more intentional. It’s funny how turning leftovers into something crunchy can bring a quiet sense of accomplishment.
In the end, it’s about those small moments—slicing, seasoning, watching them crisp up—that reconnect us to our kitchens. No matter how busy things get, a batch of these chips can always offer a little break and a burst of flavor. Sometimes, the best snacks are just a few vegetables and a hot oven away.

Welcome to Exploreing New Tastes. I’m really glad you found your way here. I’m a food blogger driven by curiosity more than perfection. I think about flavors constantly, how they change across cultures, how a small tweak can completely shift a dish, and how food tells stories long before anyone sits down to eat. This blog is where I document that curiosity, one recipe and one experience at a time.